Organizing Content
Once you've saved a lot of content to your Reader account, you might find yourself struggling to stay organized. Luckily, Reader has a few different ways to make sense of the chaos.
Tags
Tags come in two flavors: document tags and highlight tags. As the names imply, document tags are applied to the full document, while highlight tags are applied to individual highlights.
You can click a tag wherever it appears to display a filtered view of the documents it contains.

Add tags on web
On web, adding document tags is slightly different depending on how you're viewing the document.
- From the list view: Focus the document you'd like to tag (by using the arrow keys or hovering the document with your mouse) and press
Ton your keyboard. You can select the tag from the dropdown or begin typing to search. Useenterto apply to the tag and close the menu, or usecmd/ctrl + enterto apply the tag and keep the menu open. - From the document view: Press
shift + Ton your keyboard to open the tagging menu. You can select the tag from the dropdown or begin typing to search. Useenterto apply to the tag and close the menu, or usecmd/ctrl + enterto apply the tag and keep the menu open.
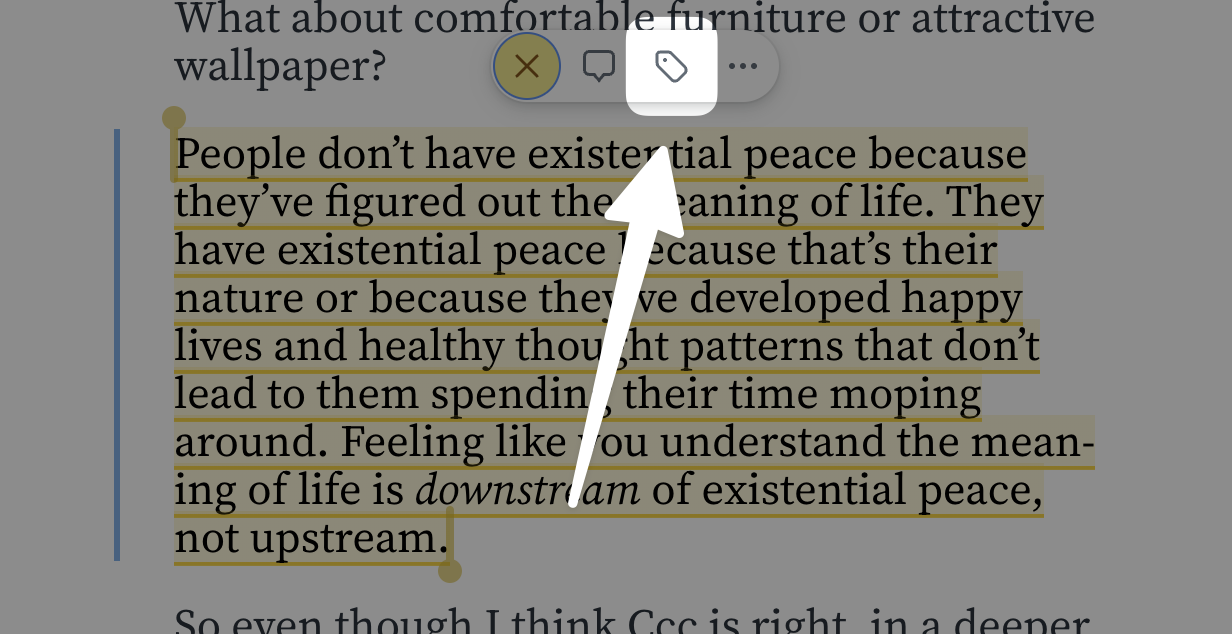
You can add highlight tags by selecting the highlight and pressing T, or by clicking the tag icon in the annotation menu that appears.
Add tags on mobile
On mobile, you can add document tags in a couple of ways:
- From the list view: Tap the three dot (...) menu in the right-hand corner of the listing card, tap Notes and tags, then select the tag you'd like to apply to the document. (If the tag doesn't already exist, just type it into the search bar and then tap the dropdown option that appears to create the tag and apply it to the current doc.)
- From the document view: Tap the icon to the left of the three dot (...) menu in the bottom bar (it looks like a comment bubble and a tag next to each other), then select the tag to apply to the document.
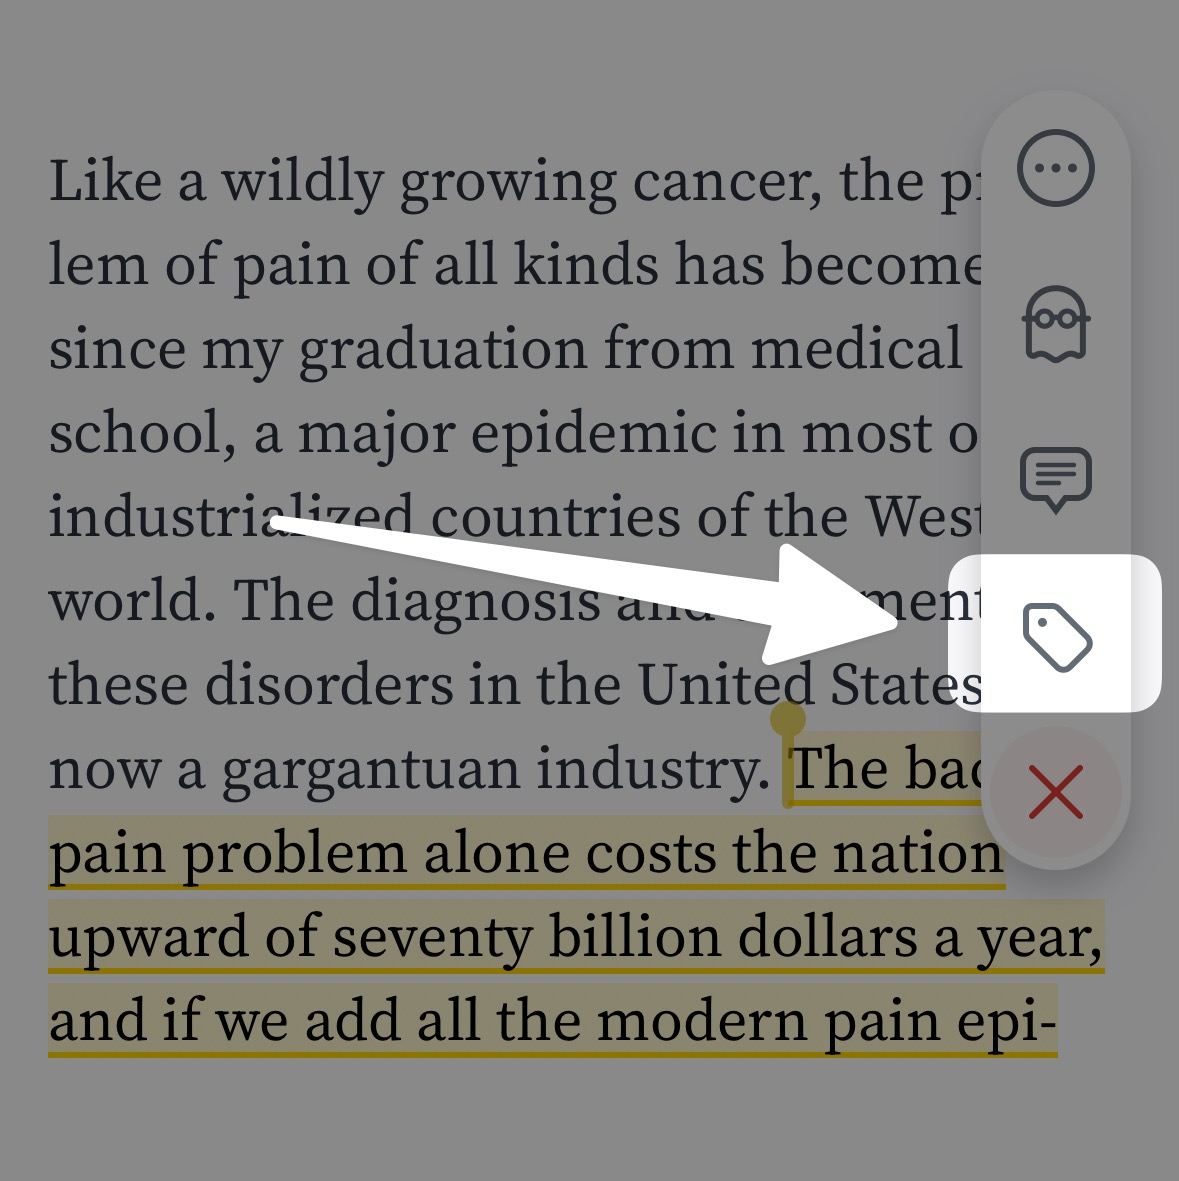
You can add highlight tags by tapping the highlight, then tapping the tag icon in the menu that pops up:
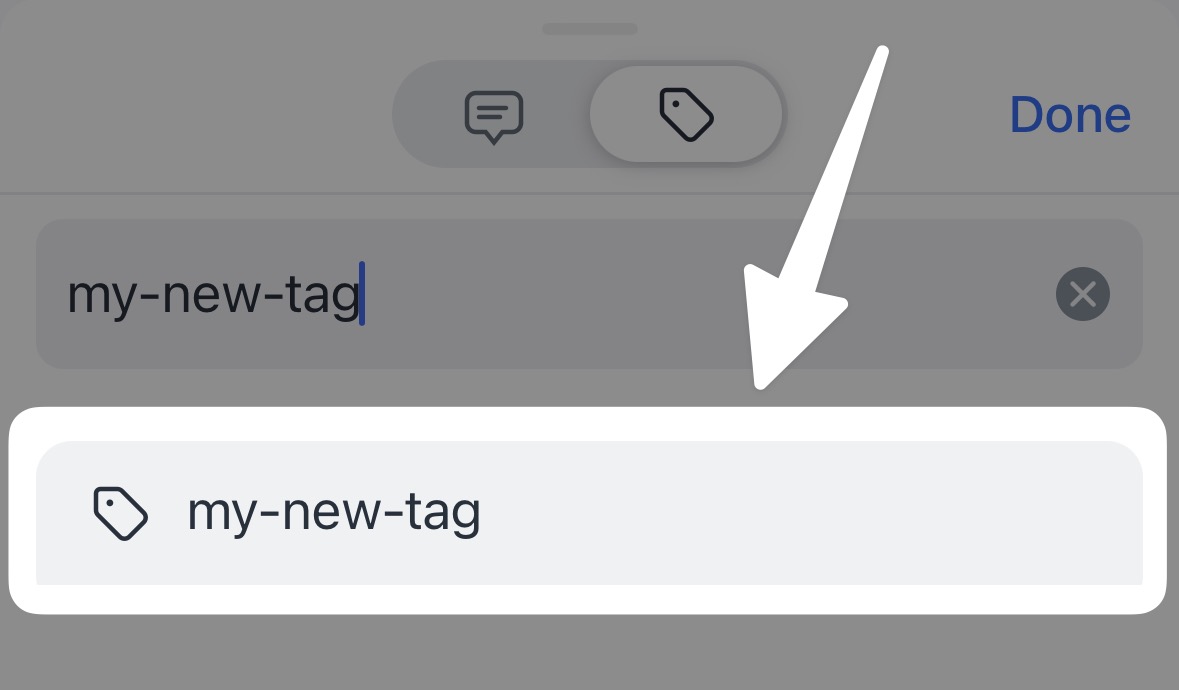
If the tag you'd like to add doesn't already exist, you can simply type it in and then tap where it appears right below the text field to create it:
Filtered Views
Filtered views allow you to organize the content in your library based on a multitude of parameters, such as the date saved, reading length, number of highlights, and more.
For a list of all the available filtering parameters, check out our query syntax guide. Or, if you need some help getting started, explore some of our query examples!
Create a filtered view on web
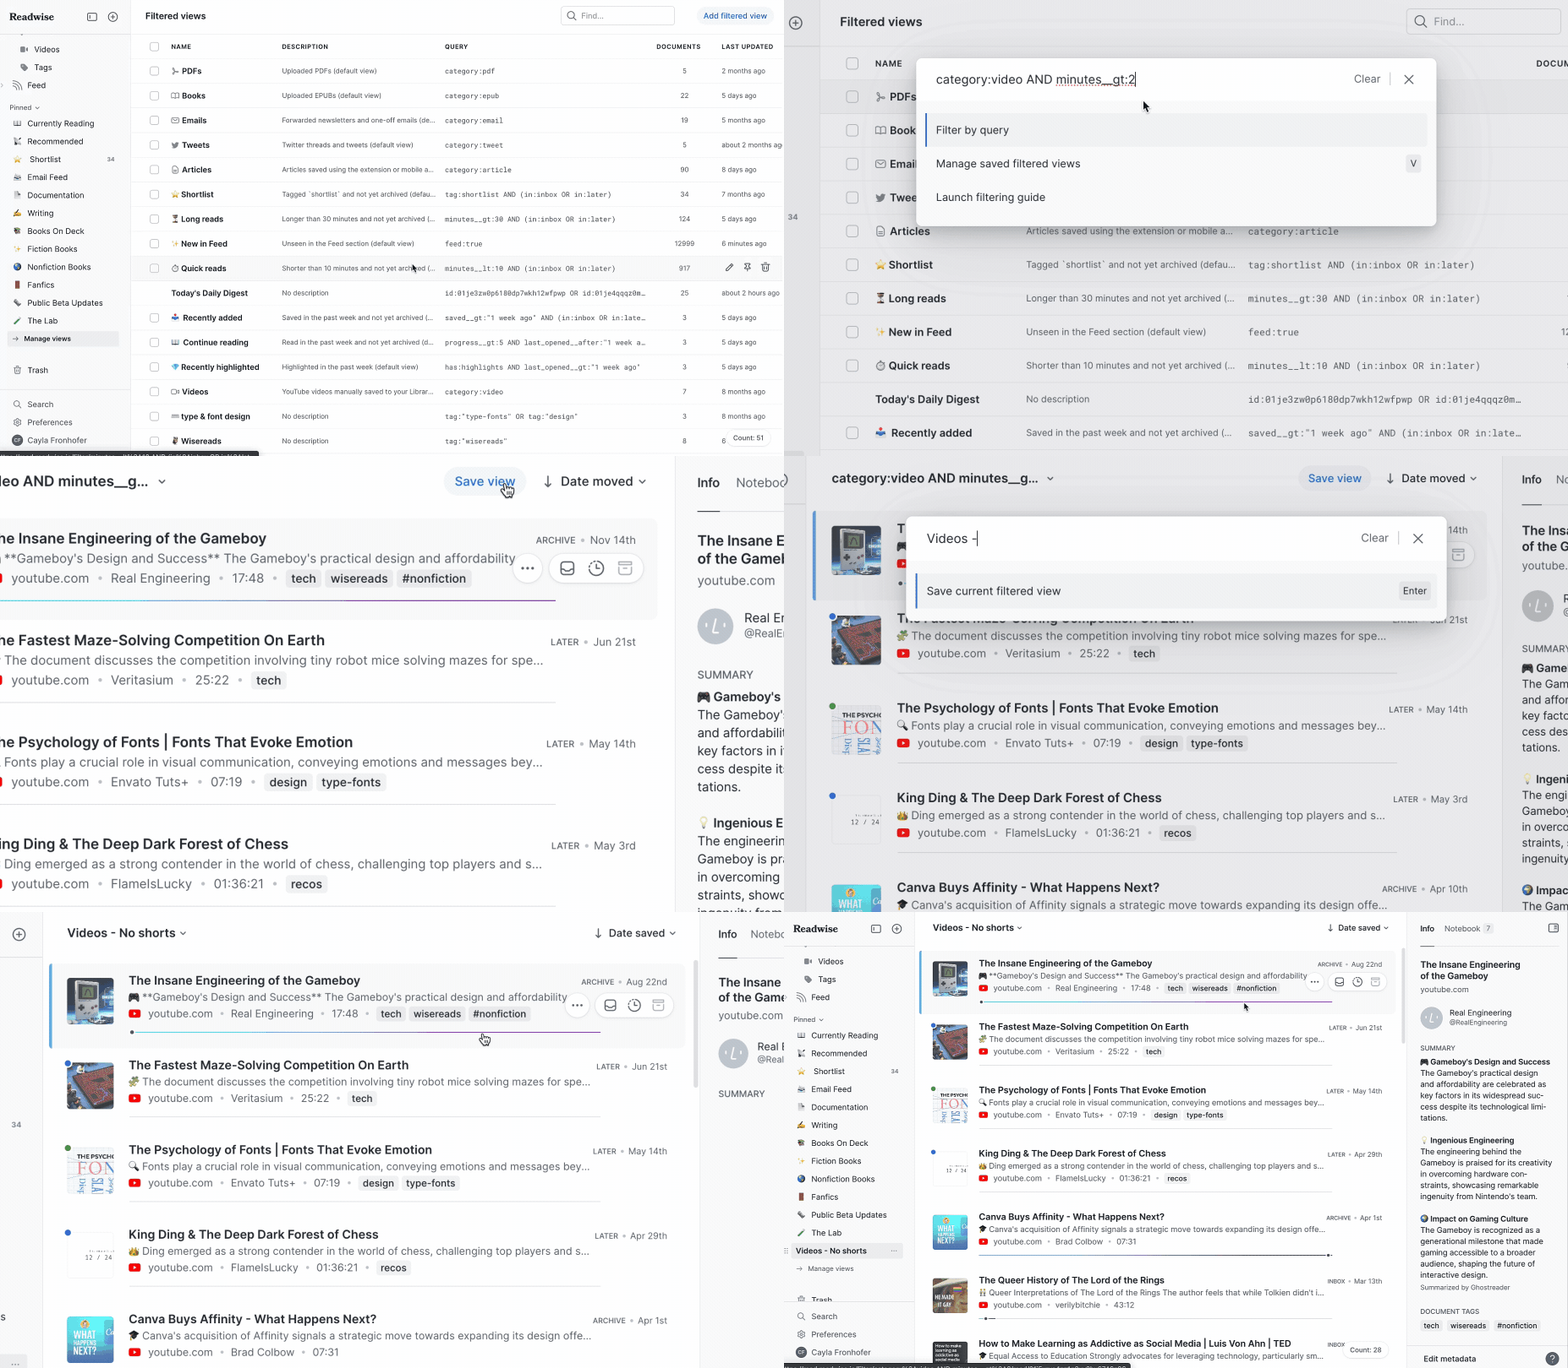
Navigate to the Manage views page by clicking Manage views below the Pinned section of the left sidebar, then click Add filtered view in the top right.
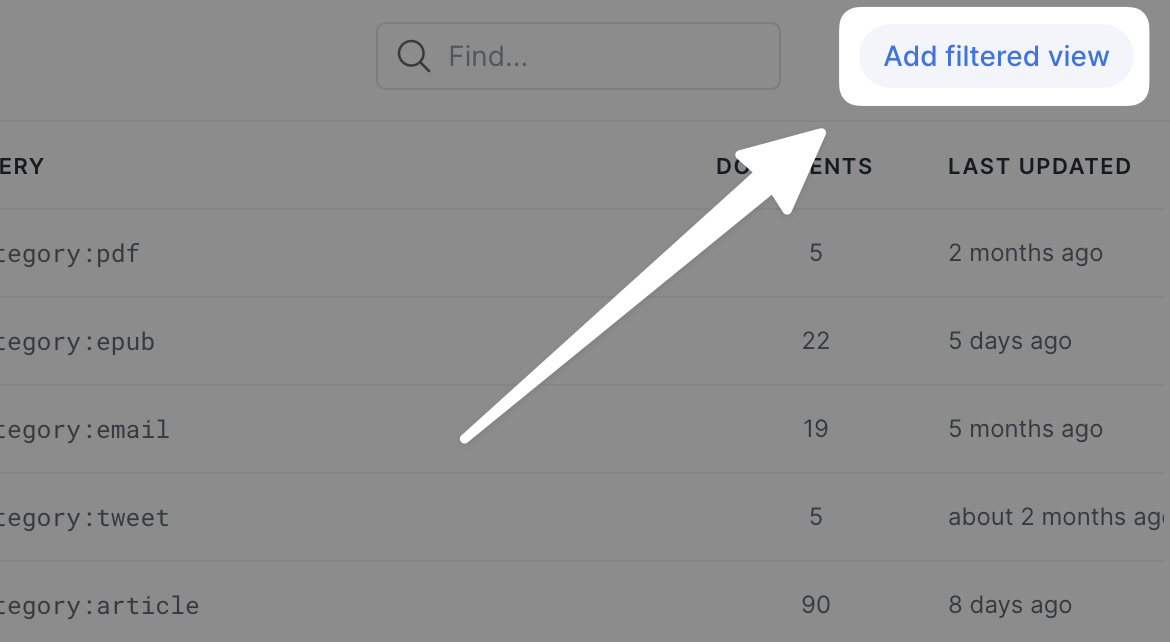
Alternatively, you can use the keyboard shortcut shift + F.
Type in your filter query and click Filter by query. Then, to keep the view for later, click Save view and give it a name.
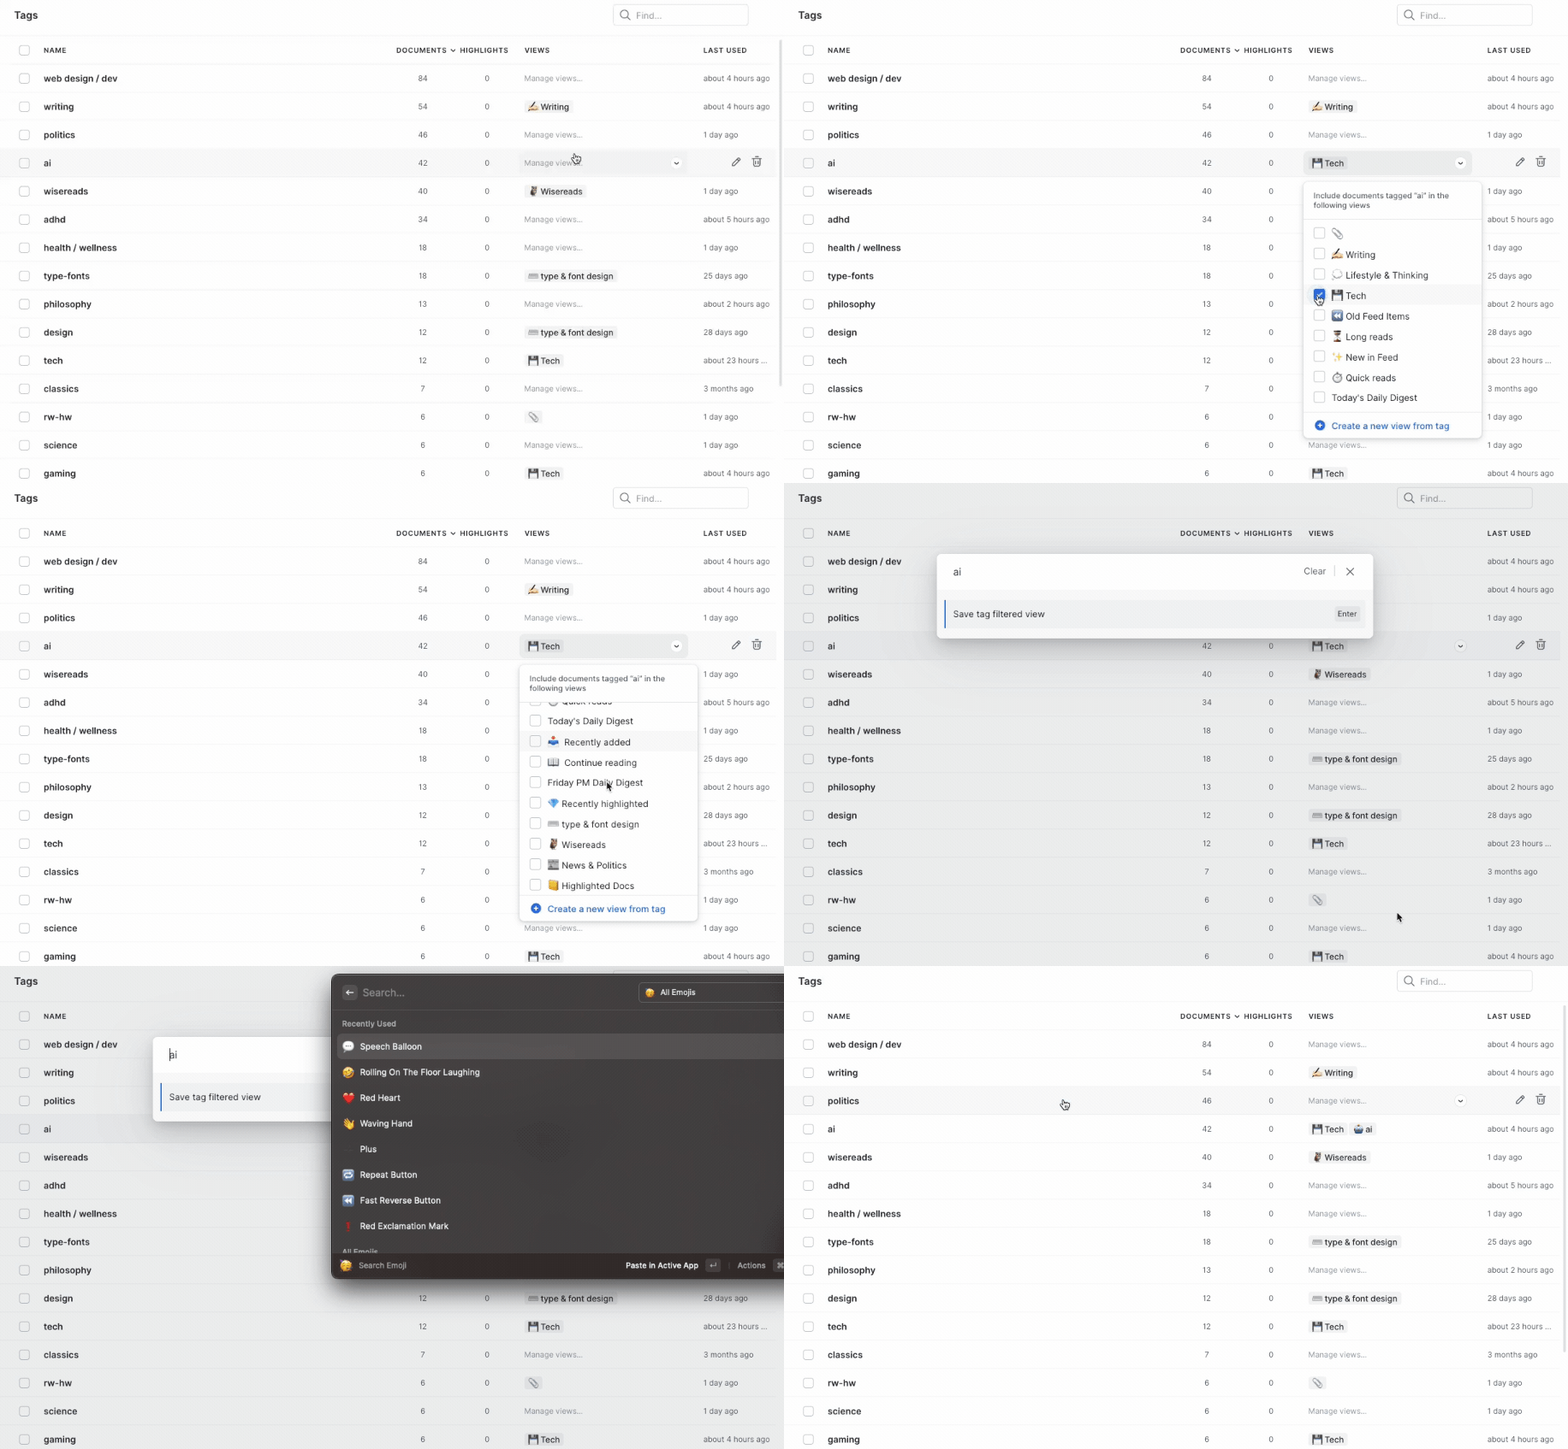
You can use the Tags page to quickly add tags to new or existing views.
Create a filtered view on mobile
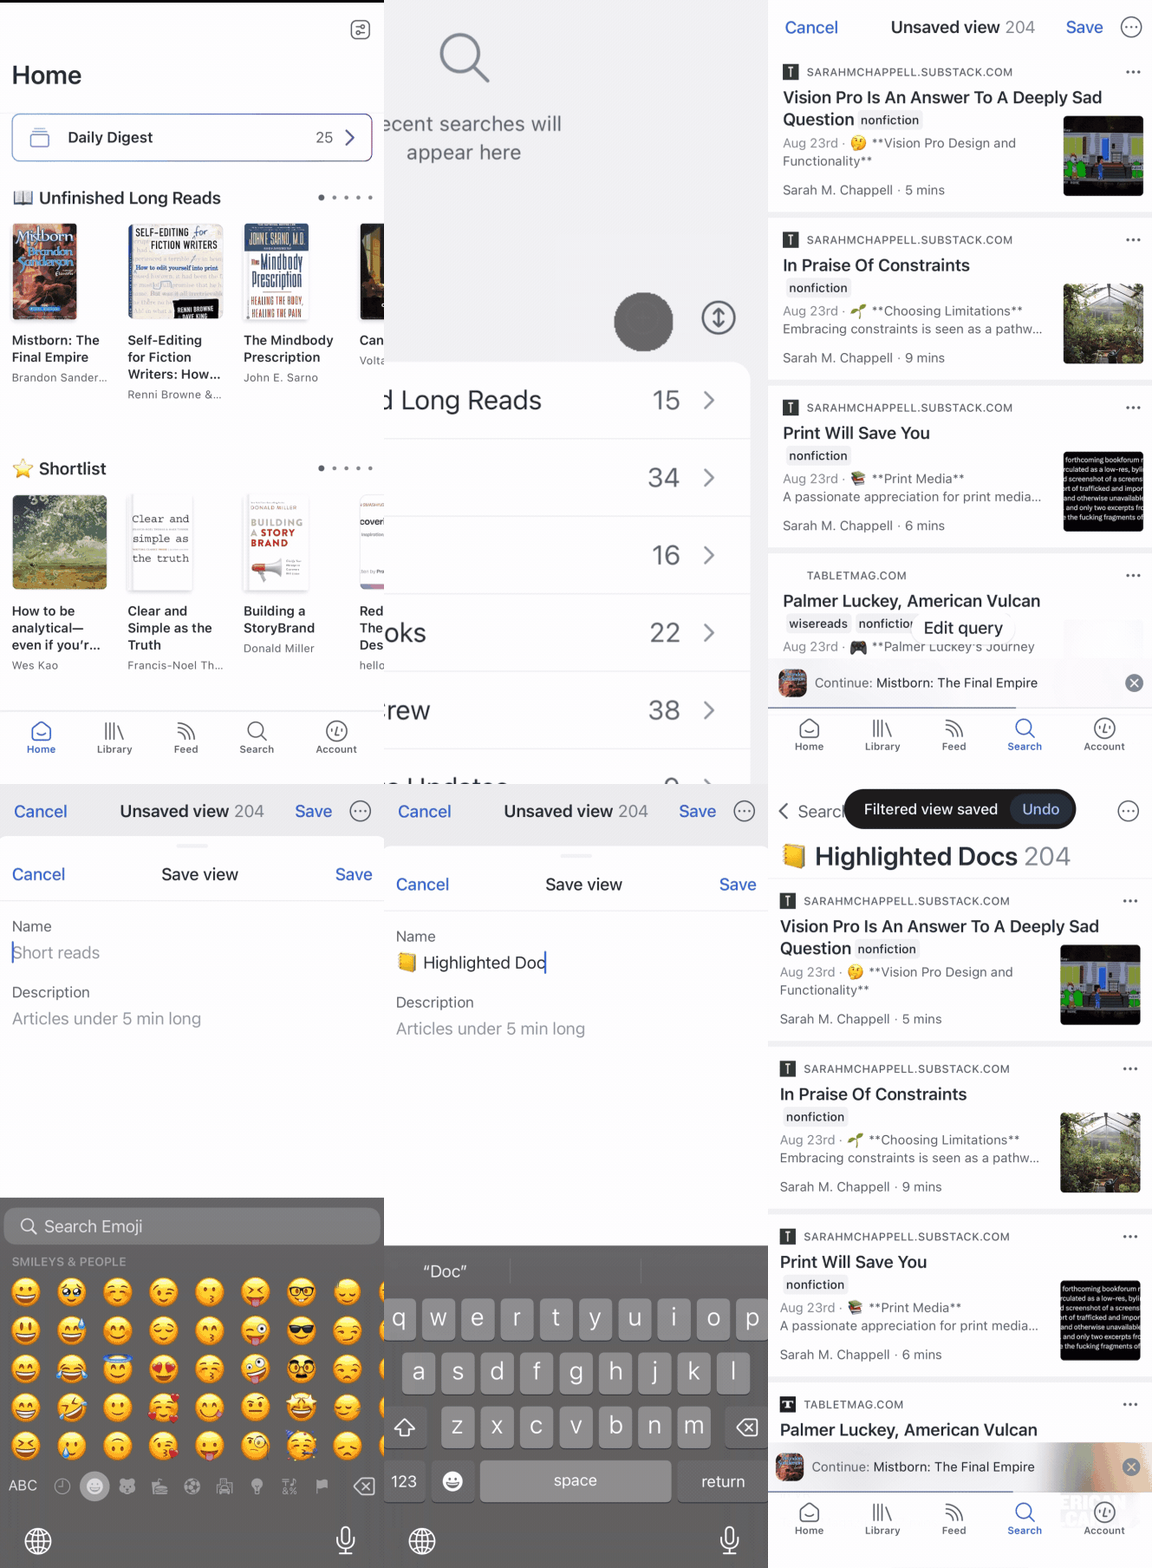
Tap into the Search tab of the Reader app and then tap the + icon in the top right corner of the views list.
Type in your filter query and then tap Show to see the filter. To save it for future use, tap Save and give it a name.
RSS Folders
RSS folders (or "feed folders") allow you to easily group feed sources into manageable categories, which you can then explore without the extra noise of other feeds getting in the way.
Create RSS folders on web

To create an RSS folder on web, navigate to the Manage feeds page and use the "Manage folders" dropdown to add a feed to a new or existing folder.
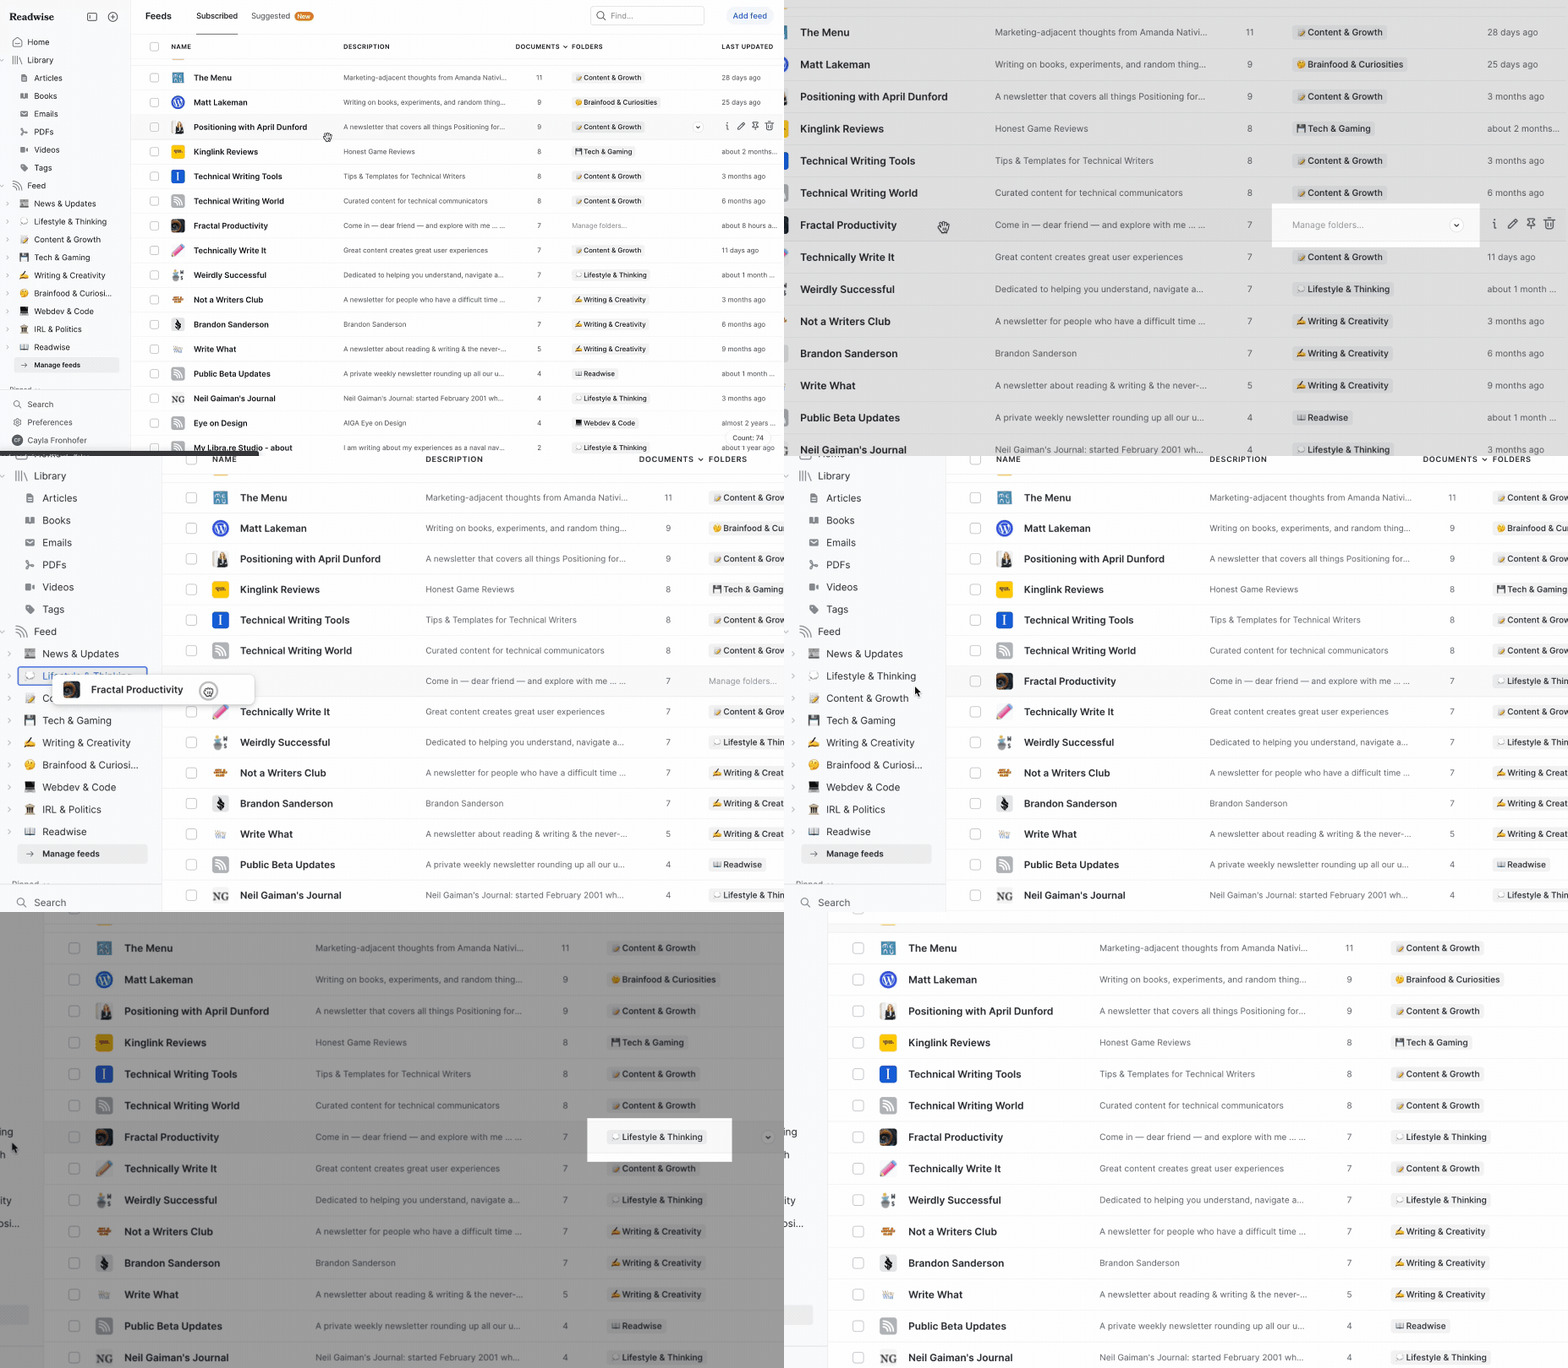
Once the folder has been created, you can drag and drop feeds from the list into the new folder in the left sidebar.
Use shift + X to open or close all folders in the sidebar at once!
Create RSS folders on mobile
On mobile, you can create folders in your Feed by tapping the + icon in the top right, then selecting Add new folder. Enter a name for your new folder, then tap Next.
You can add feeds by tapping them in the list so that they show a blue checkmark. Once you've added the feeds you'd like to have in this folder, tap Next again to create the folder.

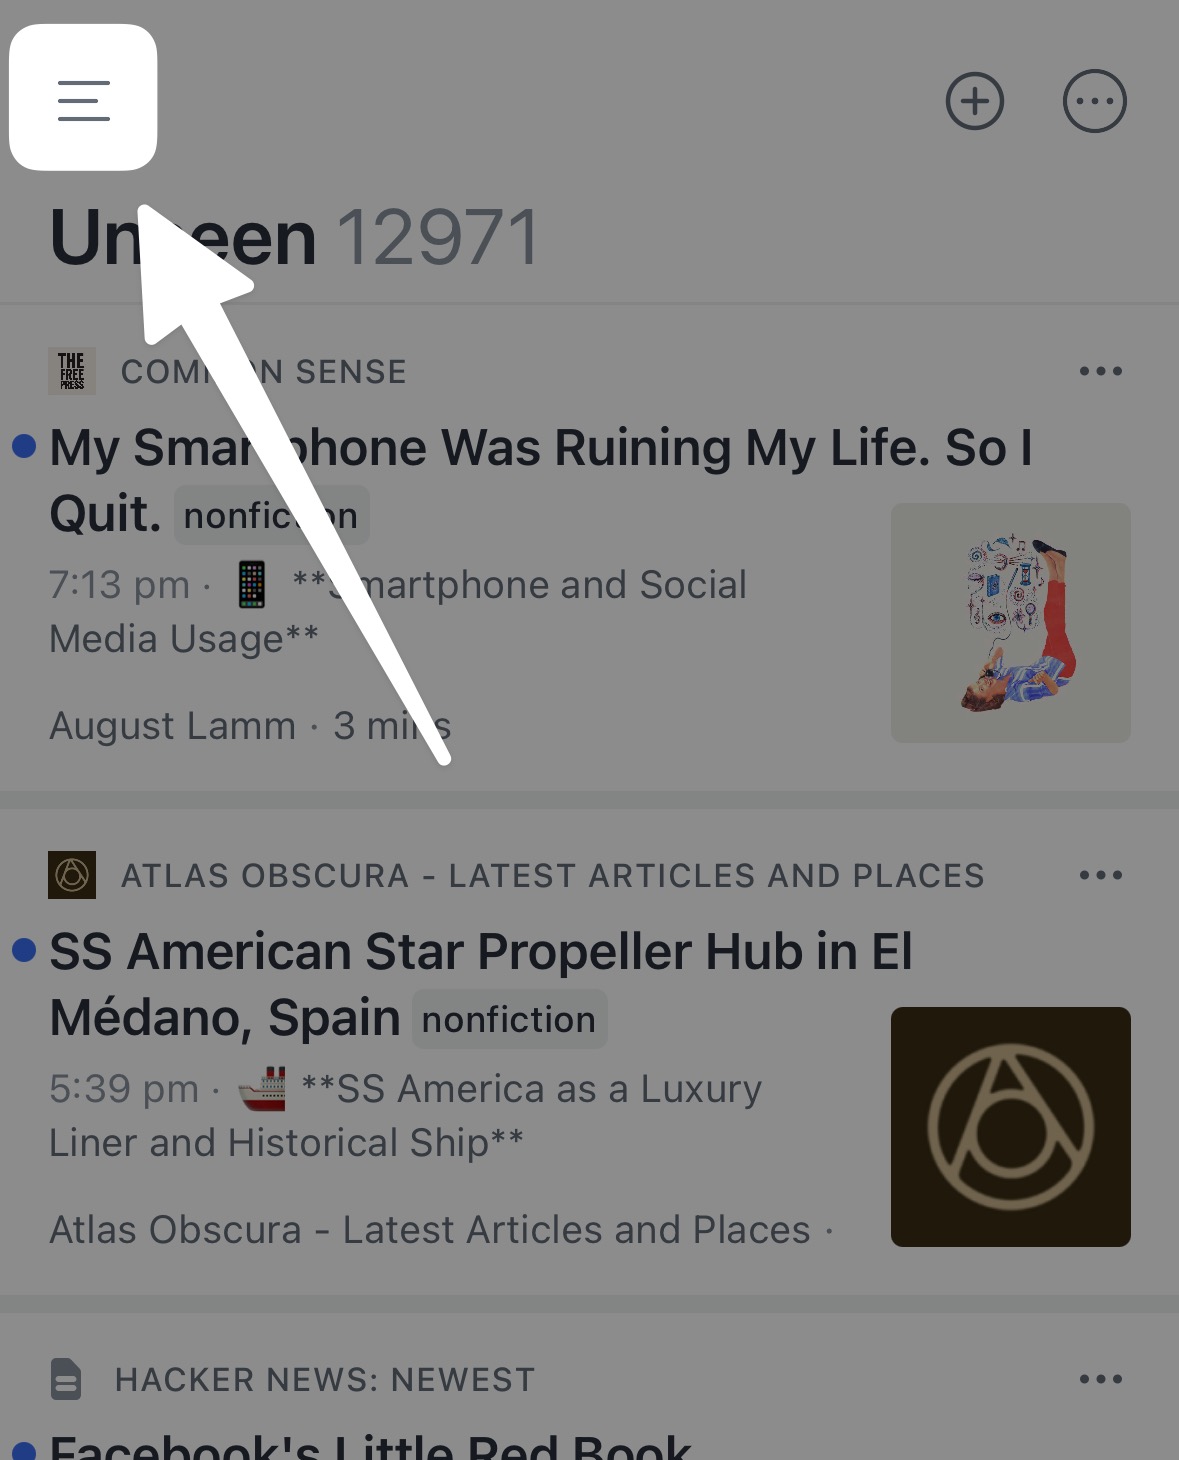
To access your folders, tap the three horizontal lines in the top left of the Feed page to open the sidebar.
Once you've created an RSS folder, you can add or remove feeds to or from the folder in a couple of ways.
- From the folder: From the Feed sidebar, tap into the folder you've like to add the new feed to. Tap the
+button in the top right, use the search field or scroll until you see the feed you're looking for, then tap the item to add it to the folder. Tap Done in the top right to confirm.
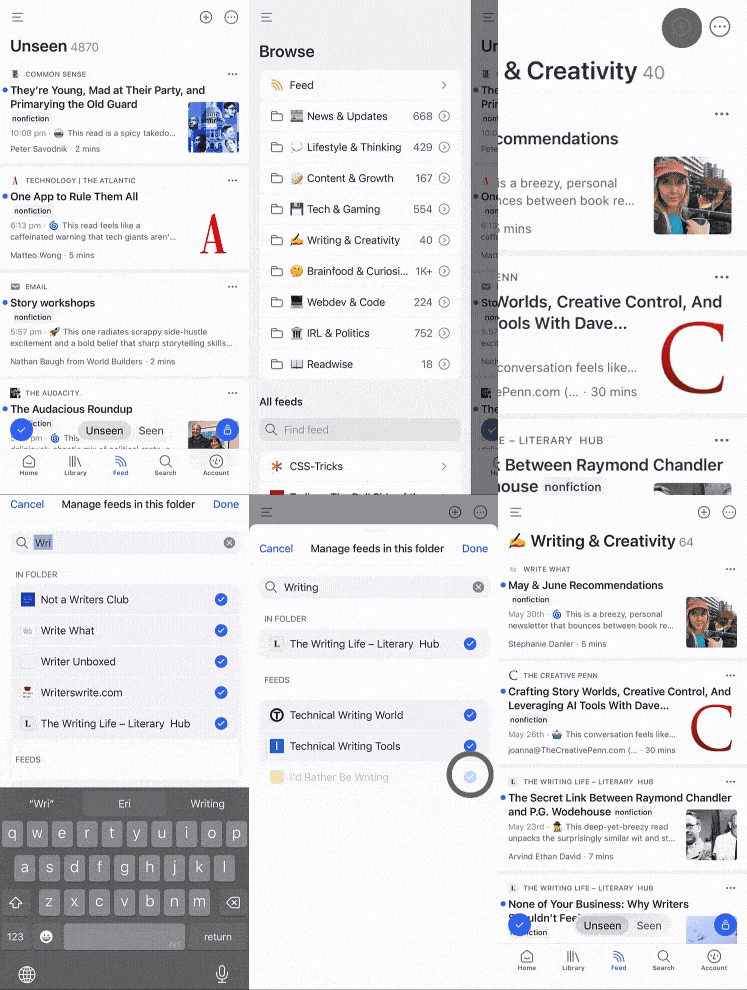
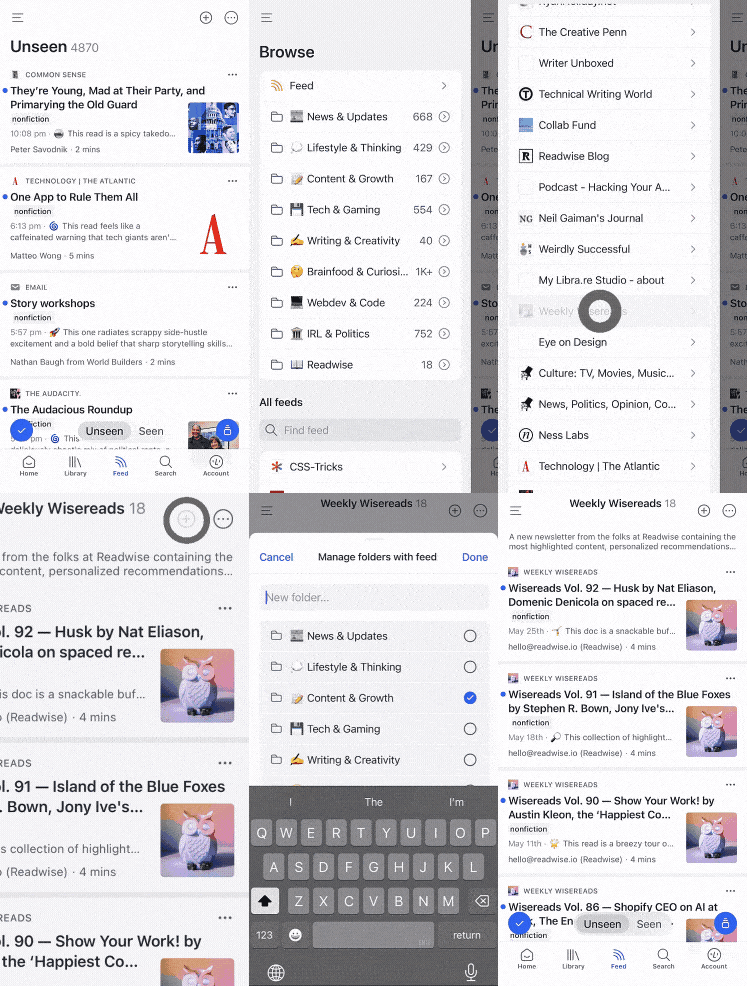
- From the individual feed view: From the Feed sidebar, tap the name of the feed you want to put in a folder. Tap the
+button in the top right, then tap the name(s) of the folder you'd like to put the feed into. Tap Done in the top right to confirm.
