


Readwise MCP Server
Get started at readwise.io/mcp
These docs offer detailed instructions and FAQs about the Readwise MCP, but if you're just looking for a quick setup guide to get up and running, check out our landing page at readwise.io/mcp.
What is the Readwise MCP?
The Model Context Protocol (MCP) standardizes how applications provide context to Large Language Models (LLMs). The Readwise MCP was created to act as a bridge between LLM clients and Readwise.
The Readwise MCP server gives Claude, ChatGPT, Cursor, or any MCP-compatible AI direct access to your Readwise highlights and Reader documents. Once connected, you can ask your AI to search your notes, answer questions using your own reading history as context, or even make changes to your Reader library for you.
Connecting your AI app
The setup steps vary by app. Find your app below for step-by-step instructions.
Claude Desktop (Chat & Cowork)
- Open Customize (from the top left) and select Connectors.
- Click the plus icon in the top right, then select Add custom connector.
- Enter Readwise as the name and add the URL:
https://mcp2.readwise.io/mcp
- Click Add. Find the new connection in the list and use the Connect button to authorize with your Readwise account.
Claude Code
Run this command in your terminal:
claude mcp add --transport http readwise https://mcp2.readwise.io/mcp
Then start Claude Code and run /mcp, select readwise, and select Authenticate.
ChatGPT
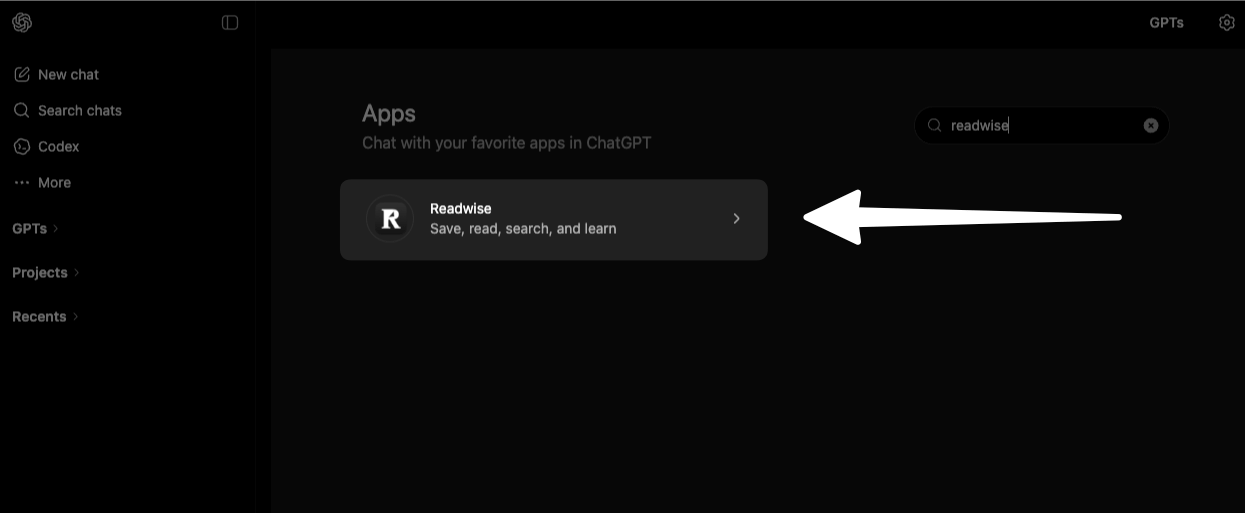
Readwise is an official App within ChatGPT. To find it, click into Apps in the sidebar.

Search for "Readwise", then click into the option that appears.
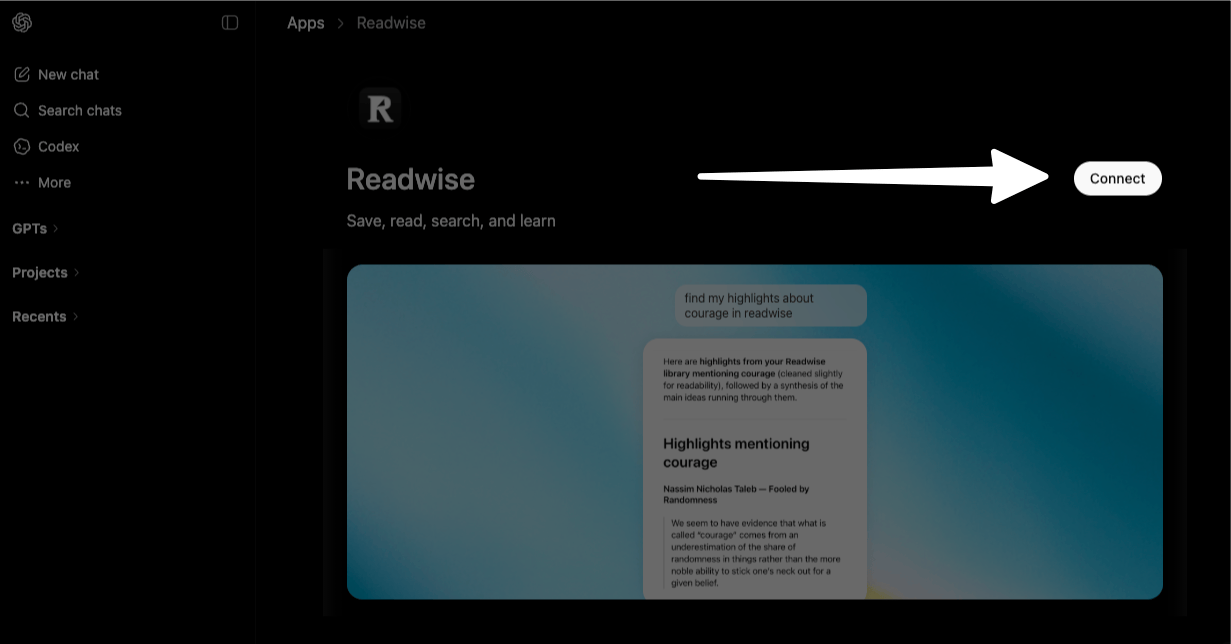
Click Connect. This will open a browser window for you to authorize the connection with your Readwise account.
Codex
Readwise is an official App within Codex. To find it, click into Plugins in the sidebar.
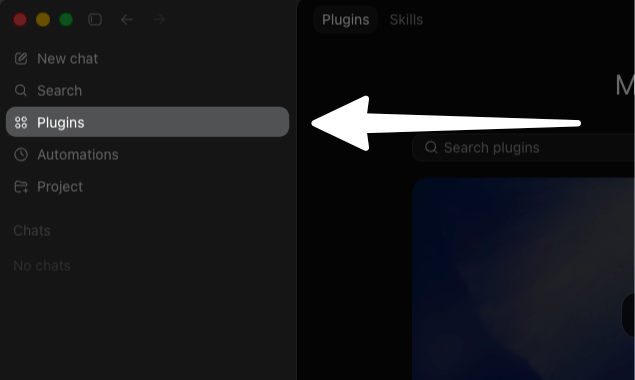
Search for "Readwise", then click into the option that appears.
Click the Add to Codex button in the top right corner.
In the popup that appears, click the Install button to connect to your Readwise account. This will open a browser window to authorize Codex to access your Readwise data.
Codex CLI
Run this command in your terminal:
codex mcp add readwise --url https://mcp2.readwise.io/mcp
Log in to authenticate:
codex mcp login readwise
Start codex — it will have access to all of your Readwise data.
Cursor
- Click this button to open Cursor and add the Readwise MCP:
- Add to Cursor
- Click Install to confirm.
OpenClaw
For the best experience with OpenClaw, use the Readwise CLI instead. Have your claw run:
npm i -g @readwise/cli
The CLI works optimally with OpenClaw and will handle authentication and data access automatically.
Perplexity
At this time, only Perplexity users with the Pro plan or higher have access to the custom MCP functionality. This feature is not currently available for users with free accounts.
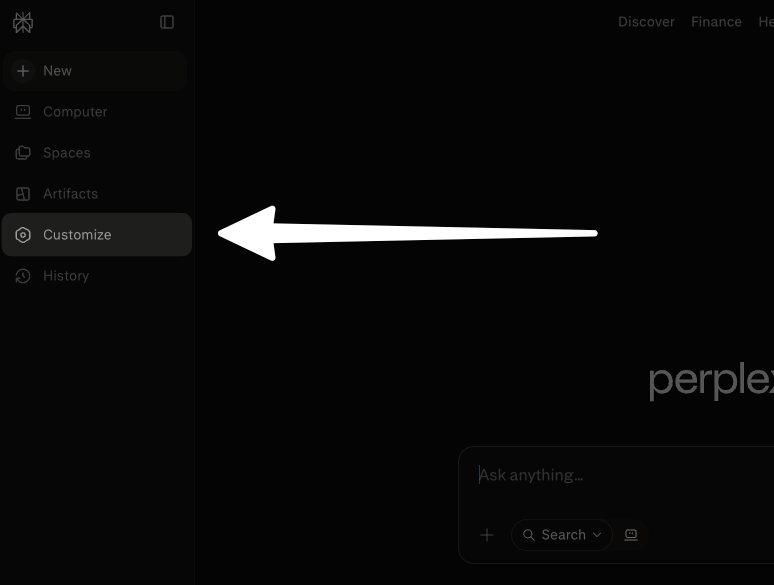
Click the Customize option in the left sidebar.
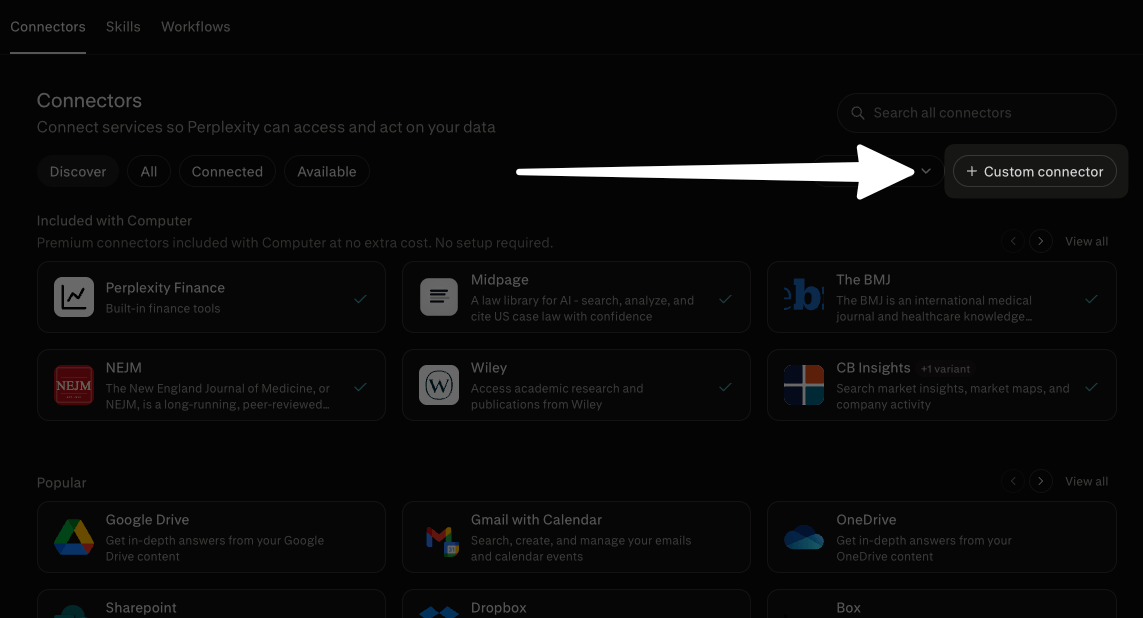
On the following page, click Custom connector in the top right corner.
Fill out the form with the following information:
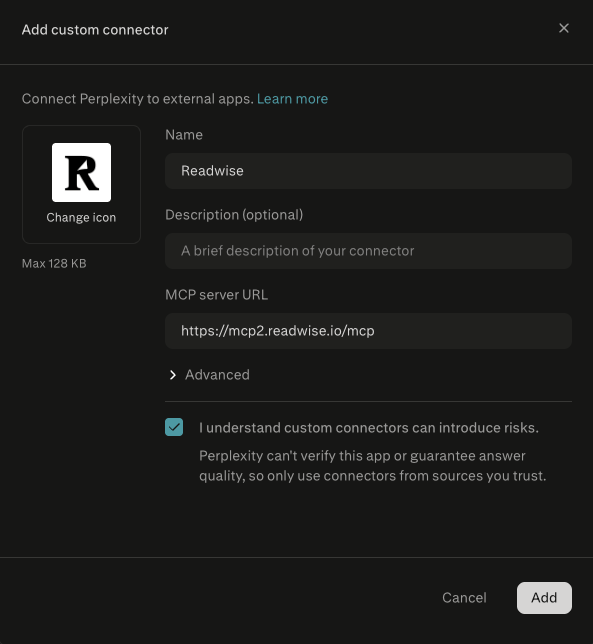
- Icon: (optional) Upload an image to represent the connection. We've made one with the Readwise logo that you can download here, to make the connection look properly official.
Download Readwise icon
- Name: This can be whatever you'd like to use to find the connection in the list. We recommend "Readwise" or "Readwise MCP" to keep things simple.
- Description: (optional) You can leave this blank, or you can enter something like "Search Readwise highlights and Reader documents."
- MCP Server URL:
https://mcp2.readwise.io/mcp - I understand custom connectors can introduce risks: Check this box. (We promise we won't steal your data!)
Once you click Add, you'll be briefly redirected to the Readwise website to authenticate the connection. Click Authorize to continue.
Other apps
For any apps that support adding MCPs as remote servers, use this URL to add the MCP directly:
https://mcp2.readwise.io/mcp
If your AI app doesn't support remote HTTP MCP servers, you can try adding it as a stdio server instead:
npx -y mcp-remote https://mcp2.readwise.io/mcp
What you can do with the Readwise MCP
Once connected, your AI tool can search across your highlights, notes, and saved Reader documents. Search combines full-text matching with semantic search, so it can surface relevant content even when your query doesn't use the exact words from your saves.
You can also use the MCP to take actions on your Reader documents, like moving them to the archive or adding tags, or create new highlights in your Readwise library.
These are the actions available to your AI tool when using the Readwise MCP:
Reader MCP tools
- Export your documents
- Get the details and metadata of a document
- Get all the highlights in a document
- Get the status of a document export
- List all of the documents currently in your account
- List all of the tags you've created
- Search all of your documents
- Add tags to a document
- Add tags to a highlight
- Bulk edit document metadata
- Create a new document
- Create a new highlight
- Move documents from one location to another (e.g. inbox, archive, shortlist)
- Remove tags from a document
- Remove tags from a highlight
- Add a highlight note
Readwise MCP tools
- Get today's Daily Review
- List all of your Readwise highlights
- Search all of your Readwise highlights
- Create a new highlight
- Delete a highlight
- Update an existing highlight
Looking for inspiration?
For more ideas about what you can do with these tools, check out our usage examples or browse pre-built skills on GitHub.
MCP FAQs
Does this access my Reader documents or just my Readwise highlights?
Both. The integration indexes your Readwise highlights and Reader documents, making all of them available to your connected AI apps.
How often does the index update?
The index updates automatically as you add or update content. After the initial full index, subsequent syncs only process new or changed content, so they run quickly in the background.
Can I connect multiple AI apps at the same time?
Yes. You can use the same MCP server URL with as many compatible apps as you like.
Is this related to the older Readwise MCP server?
The previous Readwise-only MCP server is being deprecated in favor of this one. The new server covers both Readwise and Reader data. If you configured the old server previously, you'll want to update your AI app to use the new MCP server URL instead by following the instructions above.
