How to Use Action Tags
Action tags are highlight notes that use a specific syntax to perform actions on the associated highlight. All action tags begin with a . character, and they effect how the highlights appear in Readwise.
Concatenation
Have you ever found yourself highlighting an entire fluff-filled paragraph even though all you really wanted were the key sentences at the beginning and end?
To overcome this problem, you can use the conconatenate action tag: a special note taken while you read that combines multiple, non-adjacent highlights into a single annotation in Readwise. Your concatenated highlights will be both shorter and clearer, streamlining your future reviews.
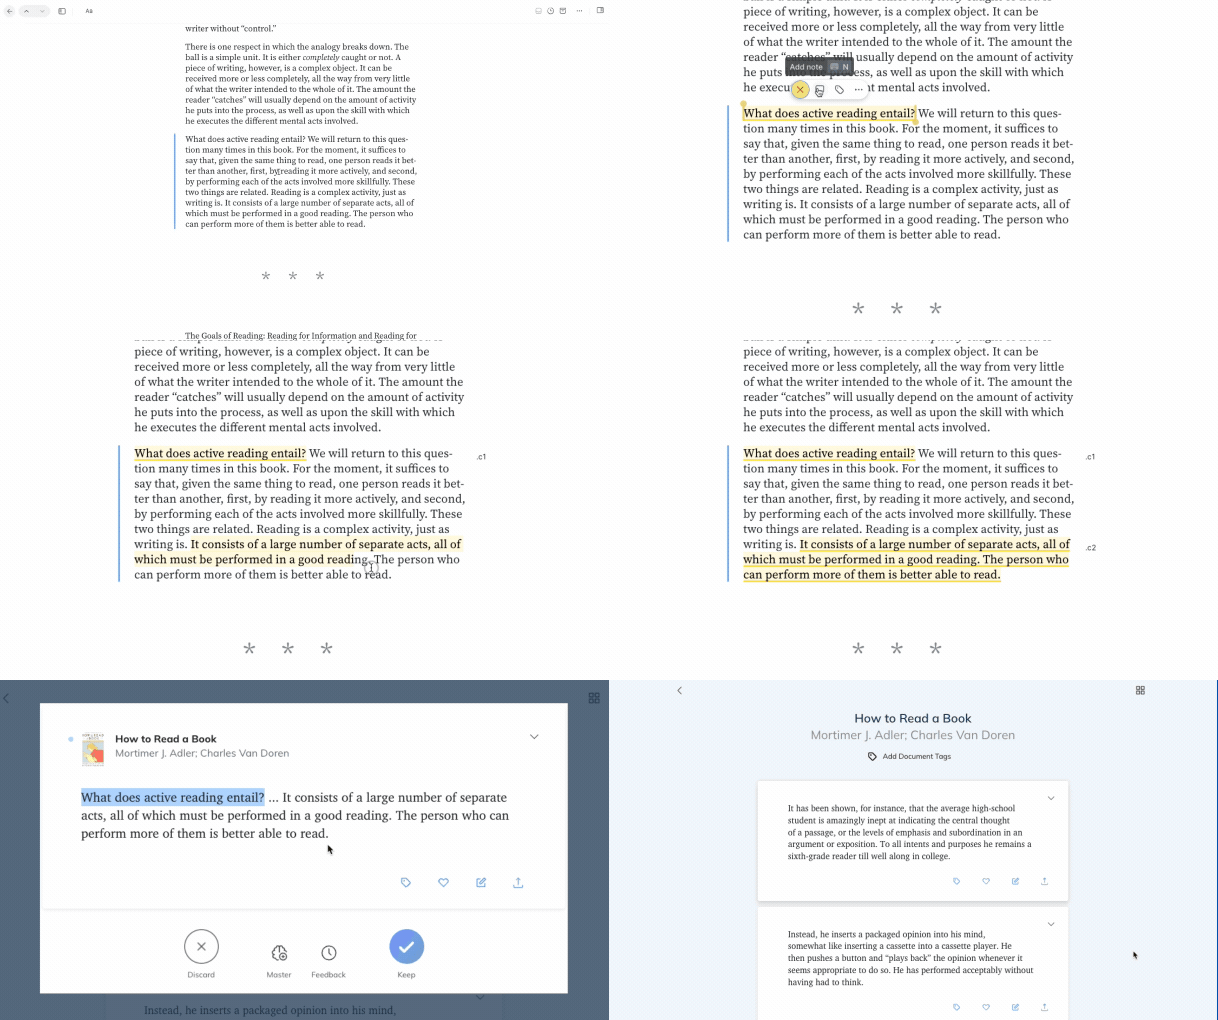
Highlight the first string of text you want to combine and add the note .c1 ("c" for "concatenate"). Then highlight the second string of text and add the note .c2. Upon importing into Readwise, these two highlights will be combined into a single annotation.

You can string as many highlights together in this way as you’d like by continuing on to .c3, .c4, etc. A tag of .c1 will always begin a new concatenation string.
The concatenate action tag works across all e-reading platforms supported by Readwise, including Amazon Kindle, Apple Books, and our own read-it-later app Reader.
Inline Tagging
Readwise has some very powerful features, such as Themed Reviews, that are most useful when they can pull from a pool of tagged highlights. However, setting aside time to go through your recent highlights and tag them appropriately can be cumbersome, and waiting for them to appear in your Daily Review delays the utility of the tag.
This is where inline tags come into play.
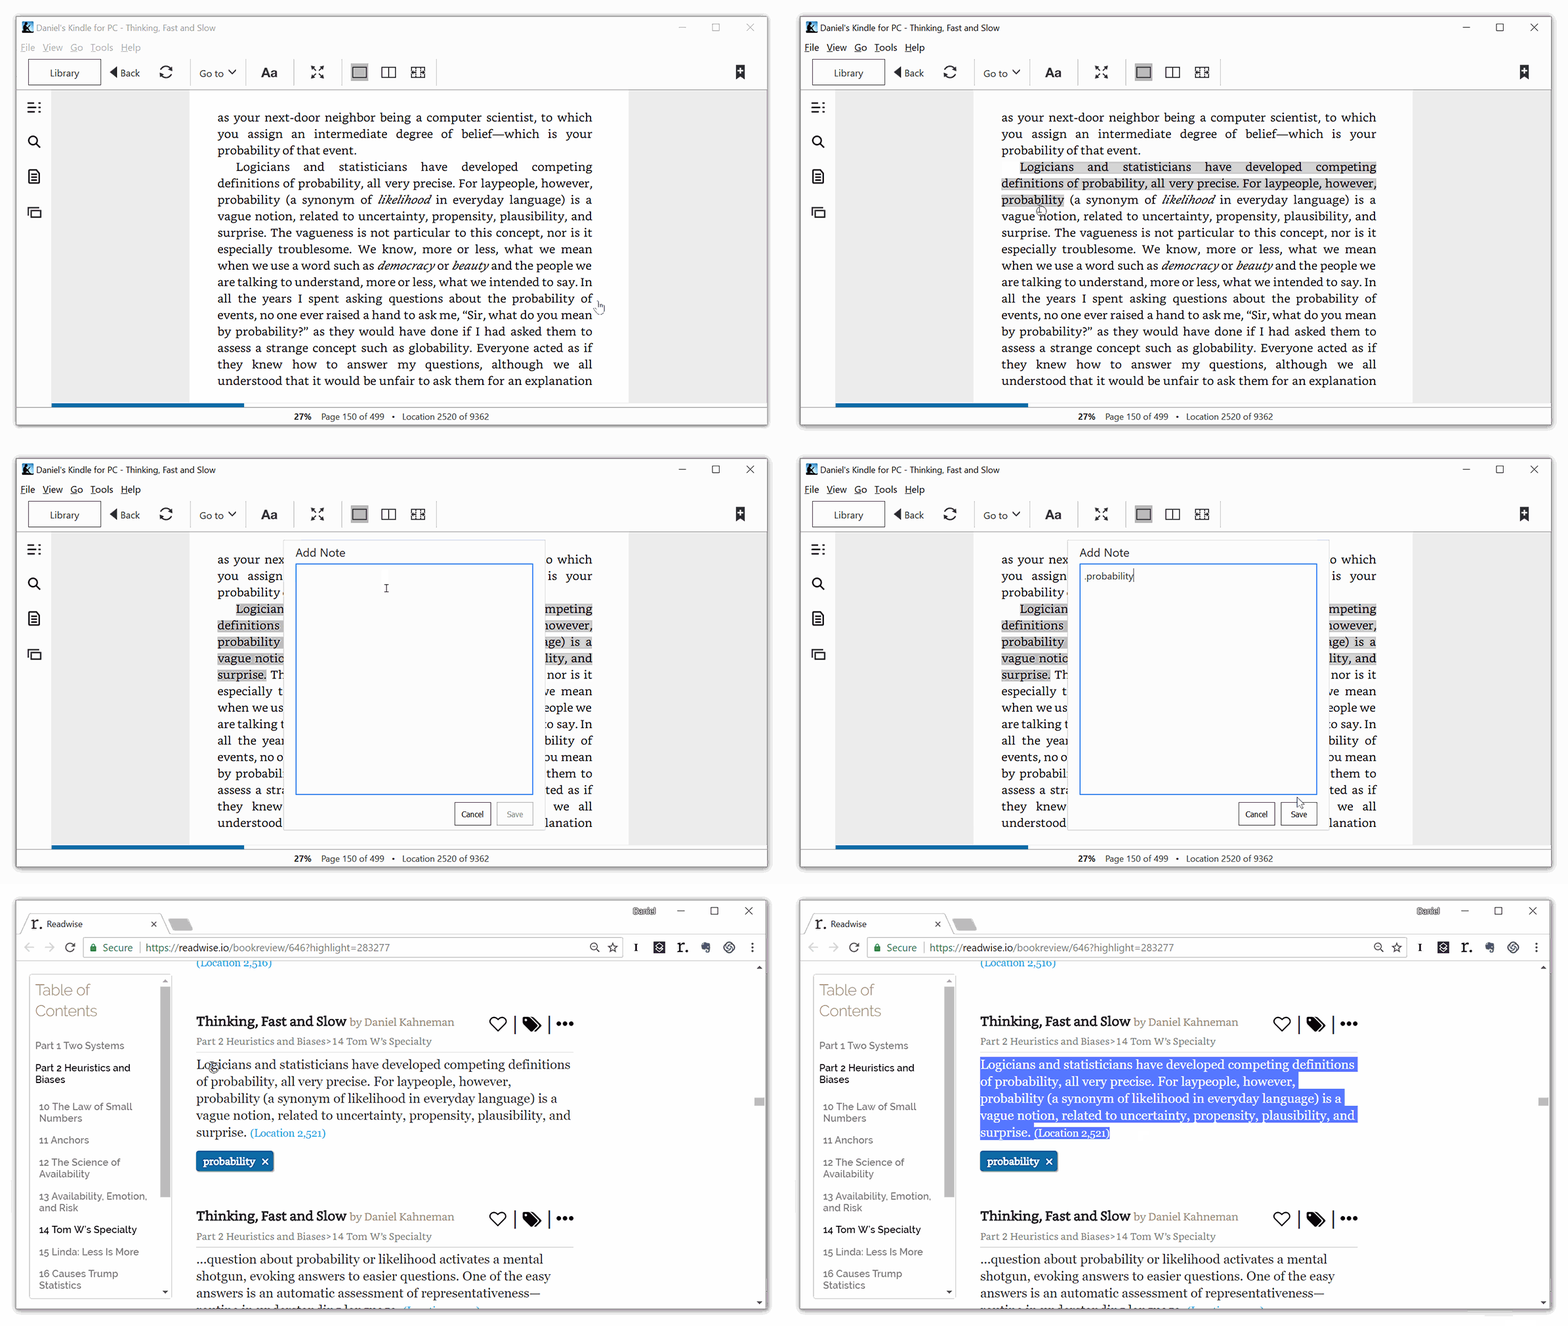
Inline tags allow you to add a highlight note wherever you may be reading (Kindle, Kobo, etc.) that will be automatically converted to a tag when the highlight is synced to Readwise. To create an inline tag, start any note with a . and follow it with a single word or abbreviated (no spaces).
For example, let's say you're interested in the subject of probability and you come across a thought-provoking passage describing the difficulty of defining what probability actually means. You want to save this passage for later, so you highlight it. You also want to attach the keyword "probability" so when you see this passage again, you know immediately what it's about. To use inline tagging, simply add the note .probability in addition to the highlight.

That's it! Your highlight is now tagged.
Headings
The heading action tag is a special note taken while you read that captures a book's structure—its parts, chapters, sections, and subsections. Once you've captured this data, the more intuitive location context of chapters becomes available in Readwise.
Even though your highlights from books typically include a page or "location" number, this context is largely meaningless unless you happen to be writing a paper requiring proper citations. For most of us, it'd be far more useful to see location in terms of the highlight's part, chapter, section, or subsection. The heading action tag makes this possible.
To create a heading, simply highlight the title of each section and add a note beginning with a period (.) followed by an h (for "heading") and then the number 1 through 3, representing the section's position in the hierarchy.
For example, with a book organized into parts, chapters, and sections, you would denote all parts as .h1, all chapters as .h2, and all sections as .h3.
Why aren't my headings listed in the table of contents?
You can start with lower level headings (e.g. .h3) and they’ll still appear in Readwise, but for the table of contents to appear on the left side of the page, you’ll need to start with at least one .h1 tag.


